Online Blog > Previous Entry 9/3/2015 > 9/10/2015 - A few notes on roofing with asphalt shingles > Next Entry 10/30/2015
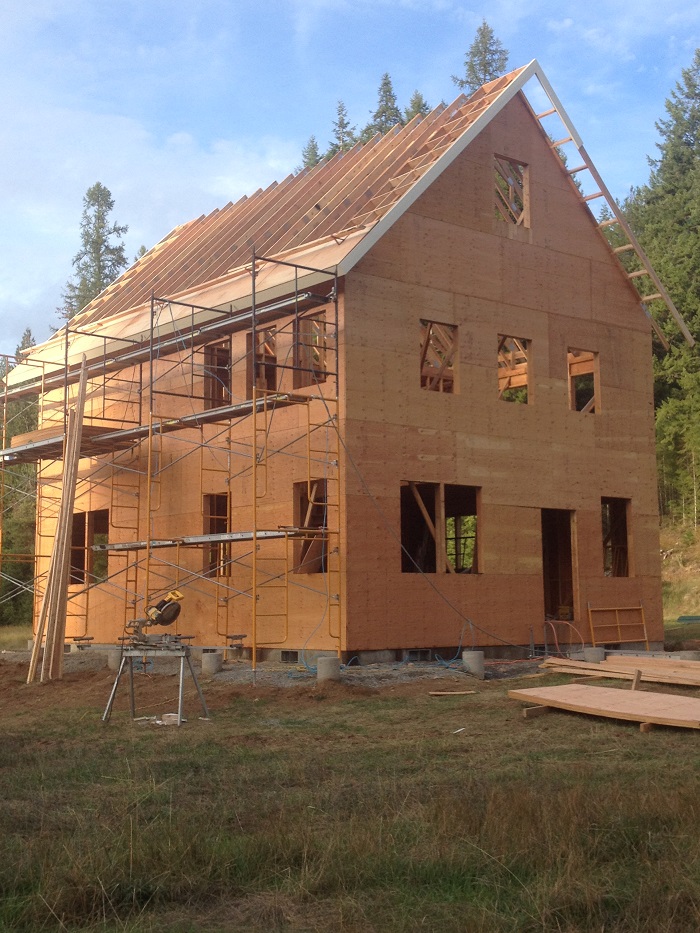
We are roofing the house we are building for a customer near Sandpoint. Let's talk about a couple of important roofing details that sometimes roofers get wrong. The job of a good general contractor is to ensure he's got good subcontractors and that on every job they strictly adhere to the best practices and codes for their installations. Mistakes in a number of trades can damage a home, not the least of which is roofing improperly installed. A couple of points on roofing that fall into the realm of asthetics - we make sure to order enough roofing so that an entire roof will be covered by shingles from the same batch. Shingle manufacturers blend different color granules to the surface of shingles. Each manufacturing run or lot may have slightly different coloration in the granule blend. The roofing packages get stamped with the lot number, and it is best to shingle an entire roof from the same lot number. If you don't, it is very possible that the one or more packages of shingles from a different lot will have a slight color variation that will be highly noticeable from the ground when the installation is complete. We ventilate pretty much every roof we do, unless the engineer or architect has designed an unvented roof system (usually with spray foam against the underside of the roof deck, which prevents all air movement). That means a vent channel is installed on the bottom side of the plywood to ensure that surface never remains moist if it falls in the territory of the dewpoint. Wet wood over the long term will result in mold on the underside of your roof deck plywood. Continued moisture will also rot the wood fibers in the plywood over time, causing roof deck collapse under loading (like snow and personnel on the roof). Many times builders and insulators install an inadequate ventilation channel. On this vaulted roof and underside ceiling, there is not an attic, and the underside of the roof deck is 18' from eave to ridge. To maintain adequate airflow over that distance, at least a 2" depth ventilation channel is needed. That is why we ordered 21" depth trusses for the rafters so that we could install R49 insulation (which is in the neighborhood of 15" of insulation and still have plenty of room for a ventilation channel. We raise the heel of the trusses at the outside wall plates so that ventilation channel and R49 insulation will run to the outside of the building envelope at the eaves. Now to the mechanics of proper roofing and underlayment installation. First up on a roof is the decking, usually OSB or plywood. Code will allow as little as 3/8" thickness to the deck, but that will typically sag between 2' centered rafters and show through the final roofing installation. We always use a 5/8" roof deck. We also always use plywood rather than OSB, even though OSB is cheaper. While the American Plywood Association (APA) claims the two are equal, we have found in real life that plywood resists penetrations from flying objects, whereas OSB is easily pierced. Just picture a falling tree branch. It is better if that ever happens that there is not additional damage to the roof deck beyond easy to repair shingle damage. We also use a 5 ply plywood rather than the readily available 4 ply, mainly for its additional strength between supports (rafters or trusses) and at gable overhangs. We will finish our brief discussion here with a look at the correct products and the layering on a roof.
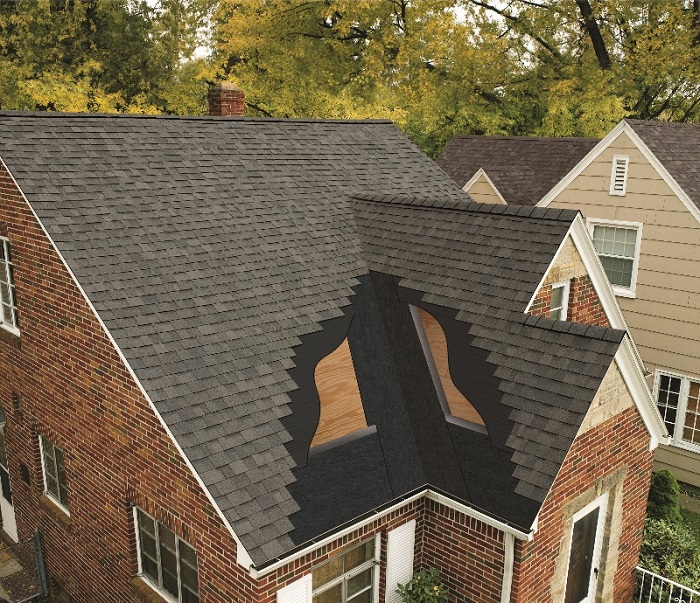
After we frame and install the roof deck plywood, the next step is to install a metal drip edge at the eaves only. We typically use a D style drip edge profile which gets water well over the edge of the roof deck and supports the ends of the first row of shingles. The next layer that goes on top of this drip edge is a product called ice and water shield. Ice and water shield is typically in rolls that are 3' wide and about 66' long. There is usually a mineral surface and a sticky backing from which a plastic release is removed at installation. The sticky back adheres to the roof deck, and the product's main advantage is in preventing leaks from ice dams. Ice dams occur when warm air heats snow on the roof, and the resulting water begins to run off the roof but may then cool and freeze on the colder overhangs. Water behind it may back up under a shingle row and may otherwise reach a roof deck except for the underlayment backup layer of ice and water shield. Ice and water shield gets installed first in all valleys and then 6' up from the eaves. This 6' means at least two courses of ice and water shield, and the reason for 6' is really because building codes want the ice and water shield extending from the eave to at least 2 horizontal feet inside the heated building envelope. Beyond these valleys and the first 6 feet of roof, we use 30# felt for the remaining underlayment below shingles. At no time would you install shingles directly on a wood roof deck. Here is a cutaway view of roofing installation:
Note the weather board patterning of underlayment up the roof. Each subsequent row of ice and water shield or felt overlaps the row below it. The ice and water shield or felt of the main deck overlaps the valley's ice and water shield. While the ice and water shield at the eaves overlaps the eave metal drip edge, at the rakes we actually install the drip edge on top of the ice and water shield or felt underlayment. This is so that if side driven precipitation hits a rake (like a gable end roof) and drives moisure under the shingles at the rake, the moisture will pass over the drip edge and end up on top of the underlayment and run down the roof plane under the shingles without ever coming in contact with the plywood roof deck. The main advantage ice and water shield has to asphalt felt is its ability to adhere to the roof deck and to create seals around all of the roofing fasteners like roofing nails. While nails that are used to fasten shingles are usually covered by the shingles of rows above, when ice dams back water up under shingles, the water could travel down these nail penetrations and reach the roof deck. The ice and water shield creates a seal around these nail shafts preventing penetration of water to the roof deck.
Of course, good building design can help prevent ice dams in the first place - proper orientation and pitch of roof slopes, raised energy heels and R49 to R60 insulation in the ceiling between the heated space and the roof deck, and adequate ventilation channels between the insulation and the roof deck, but North Idaho climactic conditions can create ice dams in a number of unpredictable circumstances, so we use ice and water shield liberally to ensure a high quality and long lasting roof installation.
|