Online Blog > Previous Entry 5/17/2016 > 6/2/2016 - Ground plumbing, slab, wall framing and truss delivery > Next Entry 6/16/2016
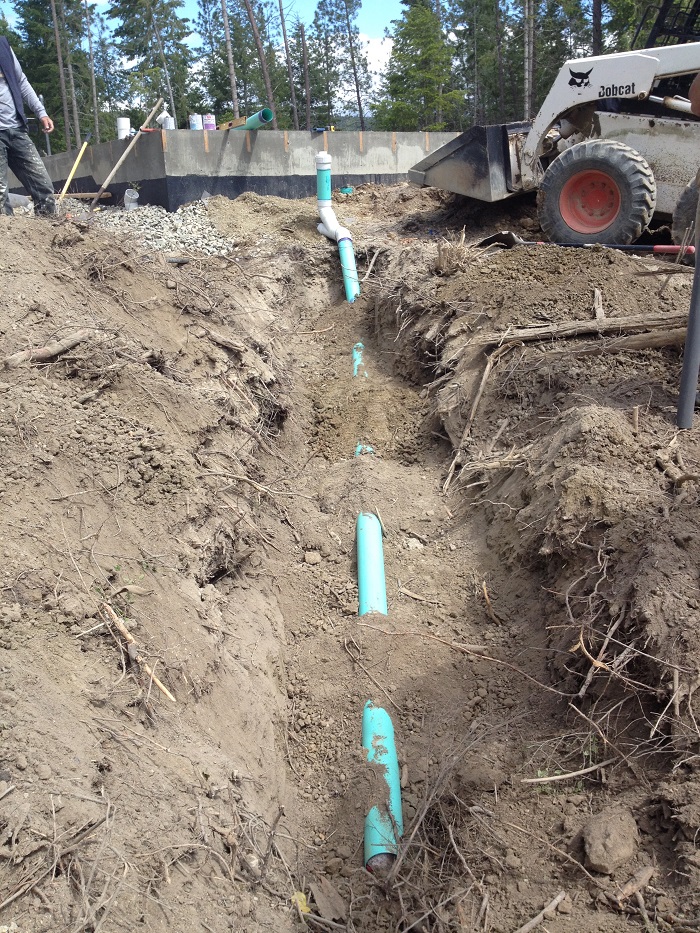
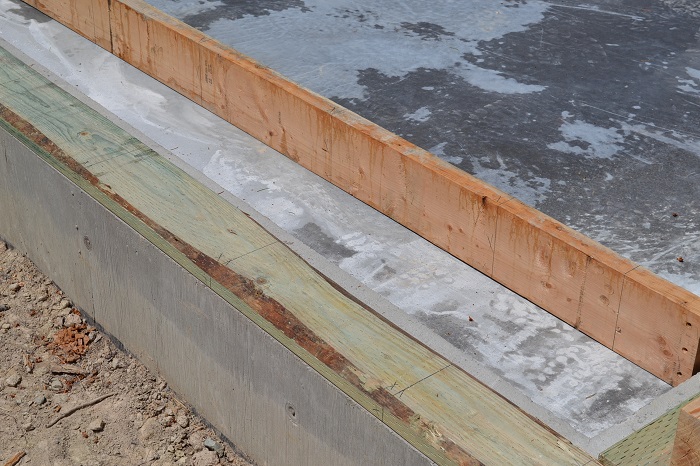
As we backfill the exterior side of a foundation wall that will contain a slab on the interior, we backfill the interior of the wall as well. We use rock chips for the backfill and keep them wet and place them in 4" to 6" lifts, which we compact as we go with a plate compactor. It is important to backfill the exterior and interior at the same time so that there will be even forces on both sides of the stem wall while it is still relatively green in its curing. One of the tasks at this point in the project is to install the ground plumbing that will be located below the slab. After a consult with the plans, this is done, with all plumbing pitched at at least a 2% grade. The main building drain is 4" schedule 40 ABS pipe. You can see in the photo below the building drain exiting the stem wall through the blockout we placed before we poured the stem wall.
Once the building drain is 2' off of the exterior of the building, it is now called the sewer. At this point, we use transition cement and install schedule 40 PVC pipe. The code requires us to have a cleanout just outside of the building, which can be seen in the photo below.
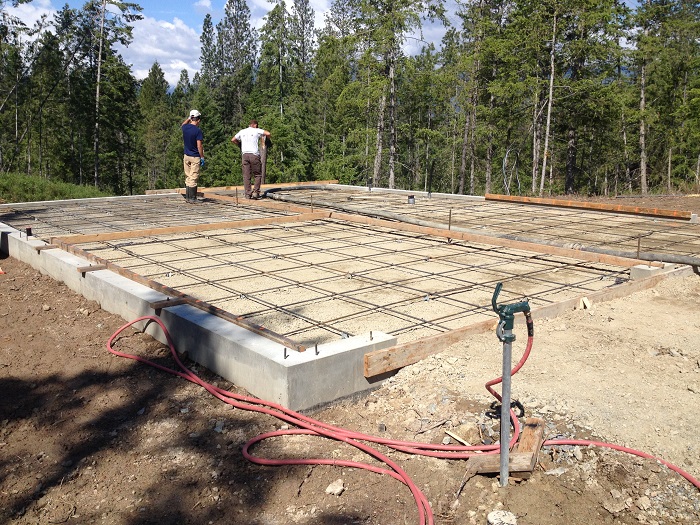
We continue the interior backfill with crushed stone, compacting as we go and bring it all the way up to desired grade. In this case, we will place a 4" thick concrete slab. For the back half of the building, the slab will be level with the top of the stem wall, and for the front half, where the roll-up doors will be located, we will slope the slab 2" toward the doors so that water and melting snow run out of the building. We use 1/2" rebar grids 2' on center in most of the slabs we do, setting it on plastic rebar chairs or paving stone fragments so that when we pour it will end up located in the middle of the slab. Grade stakes are set with a laser level so that during the pour we can place and screed the concrete to the desired grade of the finished surface. Not visible in these pictures, we have also placed a 10 mm to 15 mm plastic vapor barrier under some of the rock. We tape the joints of our vapor barrier as well. We place the vapor barrier under the final lift of rock so that when we work on top of it to place the rebar and then to place the concrete, we won't put tears in the plastic, disrupting the effectiveness of the barrier.
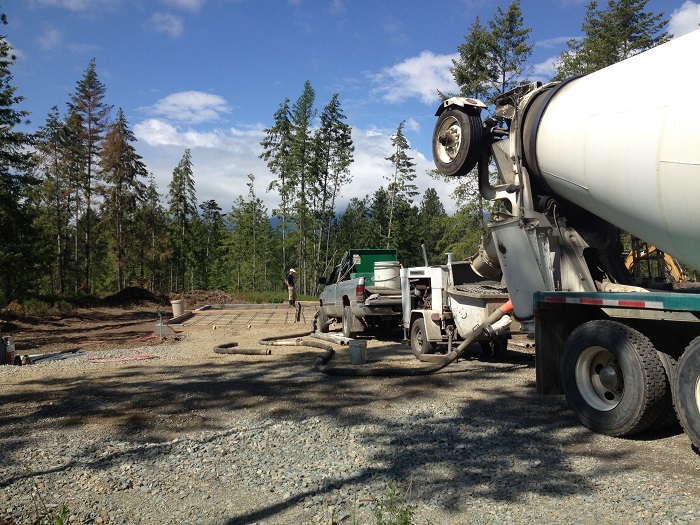
Due to rain and clay on this site, we opted to have the concrete pumped with a line pump so that we would not need the ready mix truck to drive down the sides of the building.
In the following video, we run the power trowel to finish the surface of the concrete. The general process is we place the concrete and screed it to the desired grade as we place it. Once placed, we float it with a magnesium float, which fills voids and levels it without pushing water back below the surface of the concrete. Then, once the bleed water is allowed to come to the surface and evaporates, we wait until the concrete is hard enough so that walking on it leaves a depression of our footprints of less than 1/8". It is important not to trowel the concrete surface before the bleed water has evaporated, since doing so will push the water back below the surface and will close the surface, trapping the water, weakening the top layer and probably leading to scaling of the surface over time. Once it is ready, we get on it with the power trowel using either float blades or combination blades, with the angle of the blade set very flat to minimally pitched and the blade/engine speed set at 3/4 or slightly less. This will work the plasticky top of the concrete and fill small voids. After floating the surface with the trowel, we then change to finish blades or continue with the combo blades and work the surface in repeating passes, increasing the pitch of the blades to compress the surface and increase the smoothness and hardness of the finish to the client's specifications.
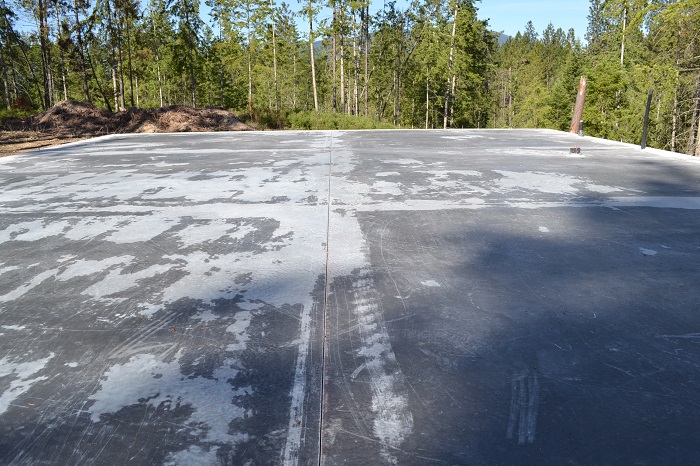
On the day after slab placement, we cut in control joints to a depth of 1/4" of the slab thickness. Control joints help control where the cracks in concrete happen. Basically cracks in concrete happen due to temperature changes and drying shrinkage and placing control joints directs cracks to happen at the joints so that there are never cracks visible in the finished surface later. The uneven coloring of the concrete at this point will clear up later as the concrete continues to cure over time. Eventually the surface will end up with even coloring.
After we complete the slab, we plate the walls. The bottom plate of the walls, since it is in contact with concrete, needs to be treated lumber, capable of resistance to decay from moisture. We place all of the plates, drilling the bottom plate for the foundation J bolts, and we then mark layout of all window openings, door openings and studs and any other special framing considerations. When we raise the actual walls, we will also place a foam sill sealer below the bottom plate, which helps to fill the voids between wood and concrete and reduces air penetration into the building.
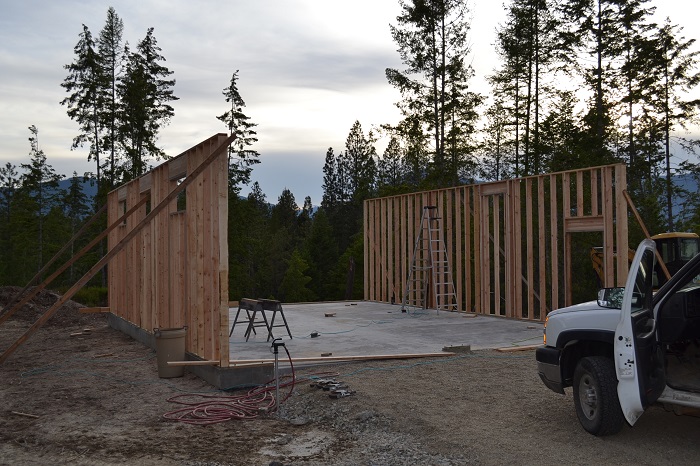
And at the end of the first day of framing, we have the long walls up and temporarily braced for the night.
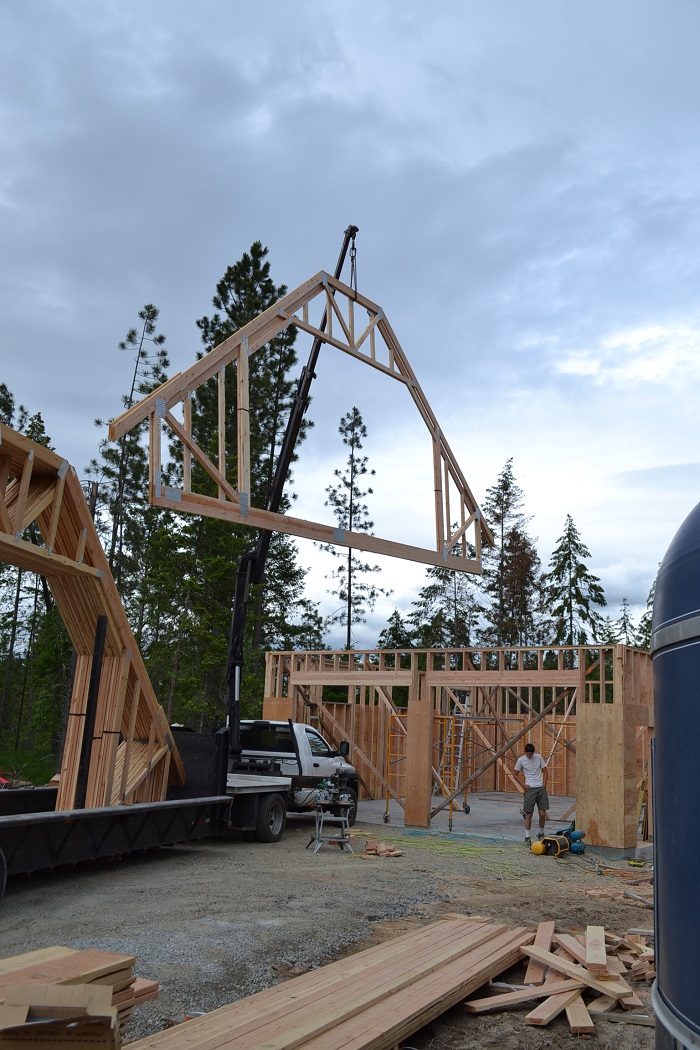
We then complete the remaining wall framing and plumb all of corners, bracing them with temporary 2x4's while we use a string line to straighten the walls in between the corners. We brace the walls for straightness and then install the first courses of plywood shear wall. We use 1/2" CDX as a strong preference over OSB. We leave off the top course of plywood sheathing, since once the trusses are placed, it will also nail into the trusses and tie them to our walls more securely. Once we are braced and sheeted, the trusses can be delivered to the top plates for our crew to roll them up. These trusses, due to the large room under the roof will require a block and tackle with a rope to raise and hold them, or we could rent crane time from the truss company to actually set them.
|