Online Blog > Previous Entry 3/21/2017 > 7/16/2017 - Garfield Bay Home > Next Entry 09/24/2017
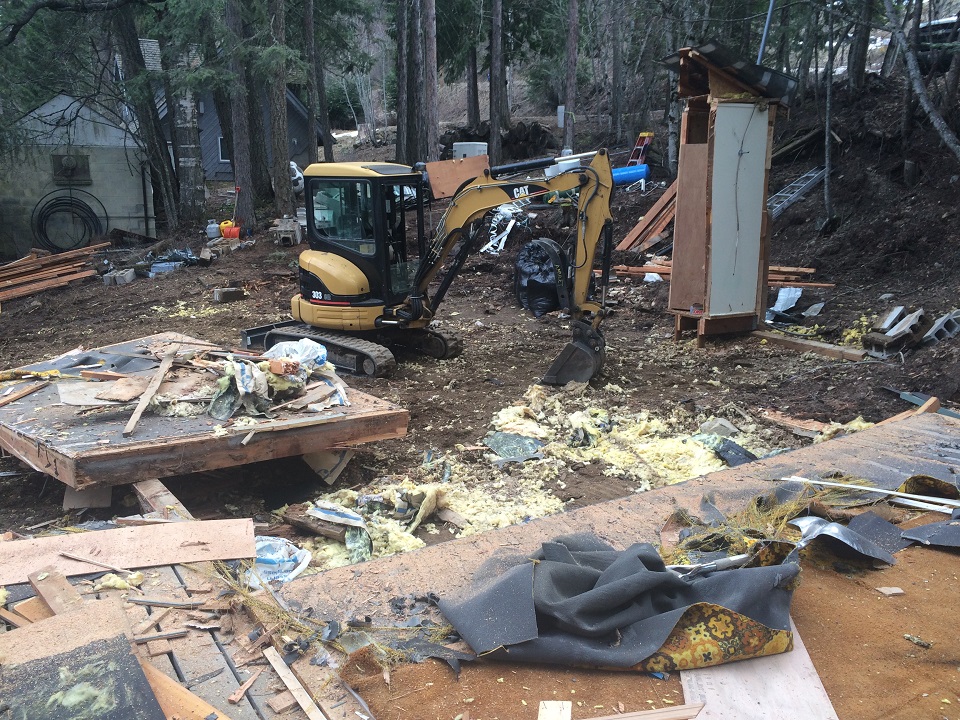
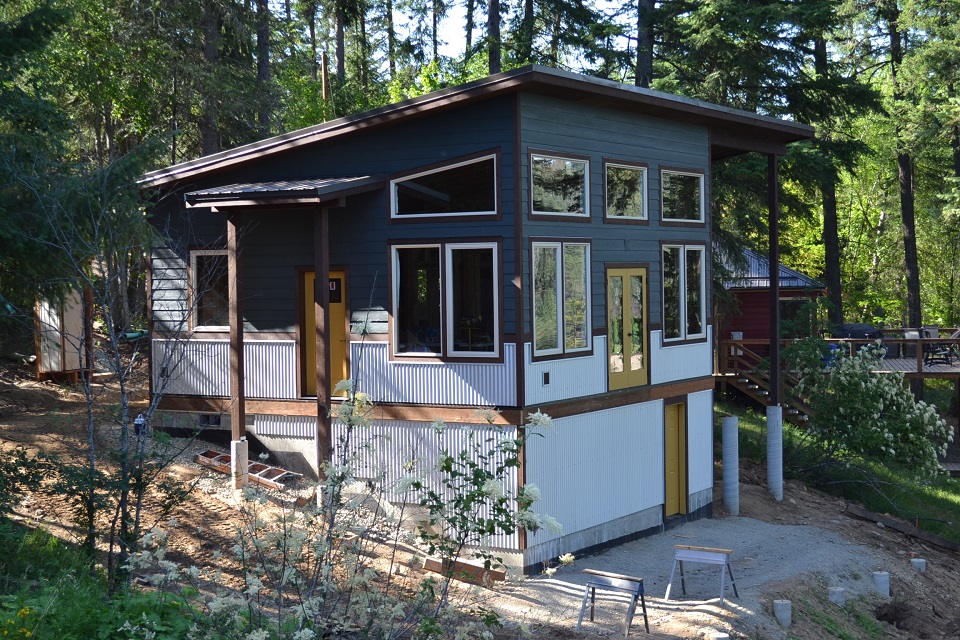
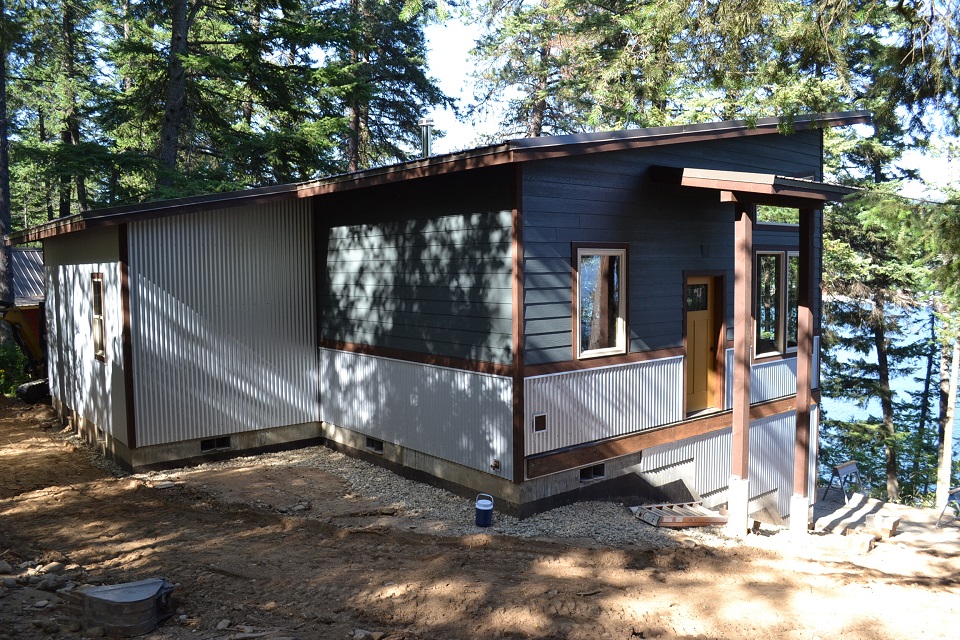
For the past 10 weeks after load limits came off with the end of Spring break-up (when the frost comes out of the ground from winter), we have been building a nicely designed custom home at Garfield Bay overlooking Lake Pend Oreille and the eastern Monarchs. It is a beautiful view from this waterfront home. The property is a second home for an out-of-state, but nearby, owner. The owner contacted us in September 2016, when I was on crutches after just having had to jump from a 4' ladder painting my own house! At first, the owner brought us a design by an architect and asked if it was feasible to remodel the existing cabin that had been built in about three stages, some of which dated to the 1950's and the 1960's. We examined the costs, the new design and the condition of that cabin and determined that it had a completely inadequate foundation. Basically, it was built on posts driven into the ground, many of which were completely rotted, as were some of the other building components that were in contact with the earth. It was decided then to demolish that cabin, which allowed a reworking of the architect's plan, since we were no longer tied to that footprint (another advantage of abandoning the old building is that we got to shift the entire new home toward the water on the property by about 20 feet, greatly enhancing the available views). We used our design software to fully develop a new plan which included applying the desired paint colors, which were from Sherwin Williams. Once the design was complete, we bid the job and contracted it under our usual fixed price contract. Many of our customers prefer this approach, as the total construction costs are known to them before construction ever commences. We assume all of the risk of price increases on materials, as well as the risks that the labor is far more complex or extensive than was planned. The only time the price changes under these contracts is if the customer decides to change some of the materials or the plan intself after construction has commenced. And, even in those cases of change orders, we fully cost out the changes before the change takes place so that the customer can make a fully informed decision as to the change. Also, with our design software, our customers always get to see exactly what the results of different materials and design changes will be to the overall design before any change is implemented. So we demolished the old cabin, salvaged what we could, like insulation, which we gave away on Craigslist, and we burned the wood and other combustibles on site, saving quite a bit of money versus hauling them away. A hot fire burns clean and is relatively friendly to the environment versus storing these materials in a landfill.
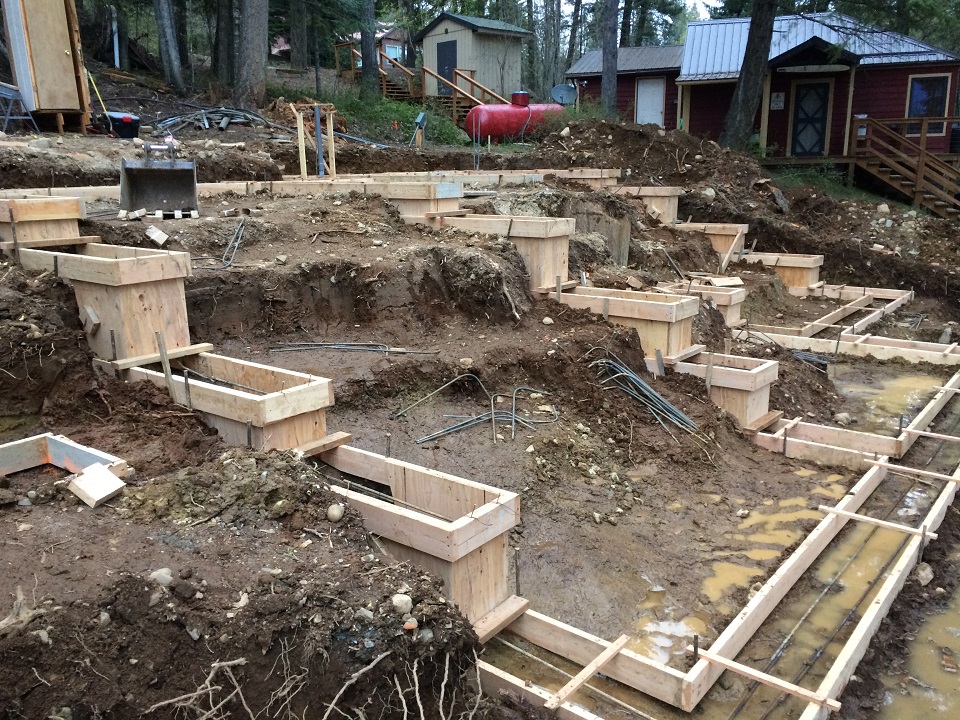
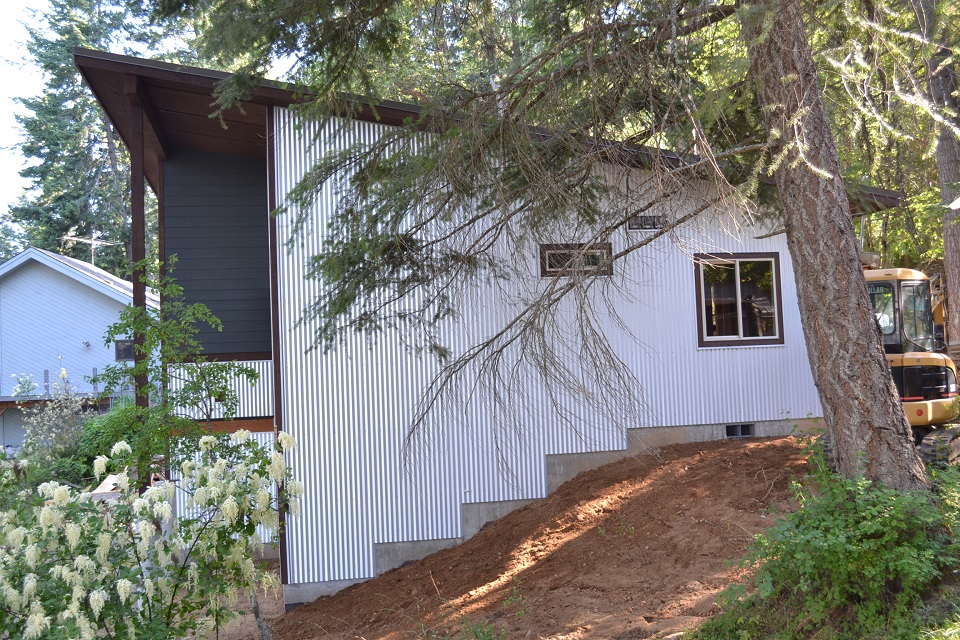
The lot is 75' wide, is at least 250' deep down to the water, but it drops precipitously to the lake. Therefore, even on this relatively small home footprint, it was necessary to step the foundation down the hill a total of 6' in just 34':
We typically do all of our own excavation and concrete work, as was the case here. In the following photo, we are prepared to pour the rebar reinforced concrete footers for the exterior building wall support as well as for the interior pony walls that support the main floor and the concrete piers that will support the deck that we are building later:
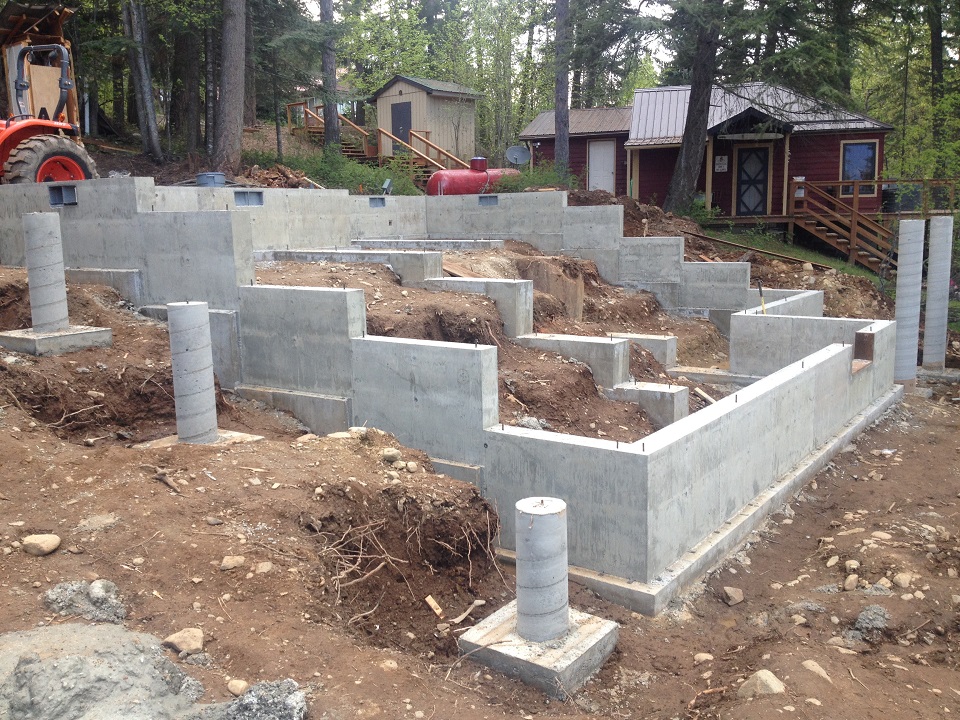
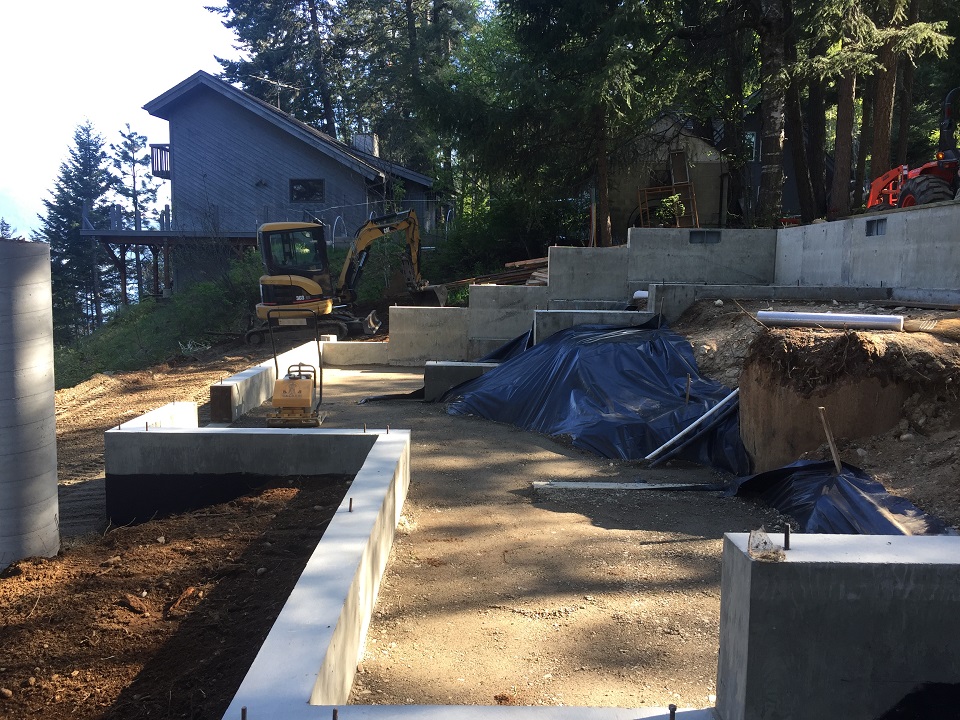
It was really wet on this site during construction of the foundation. We made sure to damp-proof the foundation with asphalt emulsion, and we put in an extensive french drain system using 4" perforated PVC pipe at the base of the exterior of the footers with an outlet to daylight on the low side of the foundation. Also, when we excavated, at the lowest spots on the terrain, we actually scraped granite and found water to be flowing on top of this layer of rock. Since that would have ended up in the basement portion of this foundation in the future, we installed a drain system and drain rock below the crushed gravel of the basement floor. This also exited to daylight via the french drain system:
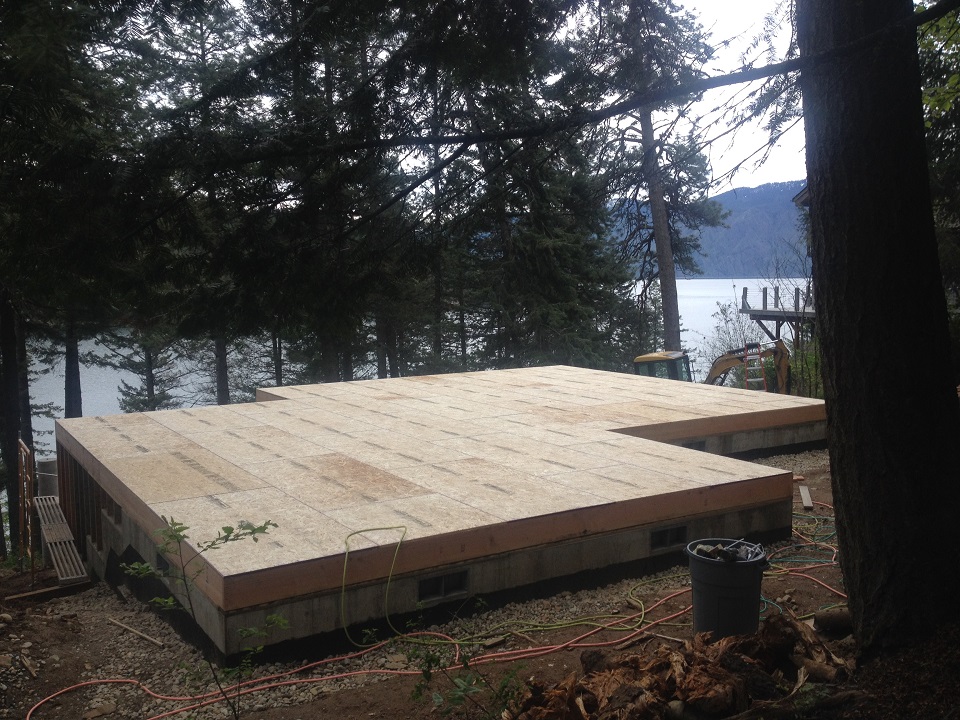
In the photos can be seen the 6 mil black Polyethylene vapor barrier we use on the floor of the crawlspace. In this case, we placed some compacted crushed stone on the floor of the basement/crawlspace, and we placed this vapor barrier above the drain system but under the crushed stone. The photo below shows that the site is now much drier and more manageable to proceed with framing:
The first stage that gets built are the lower pony and basement walls upon which the main floor deck is framed and sheeted.
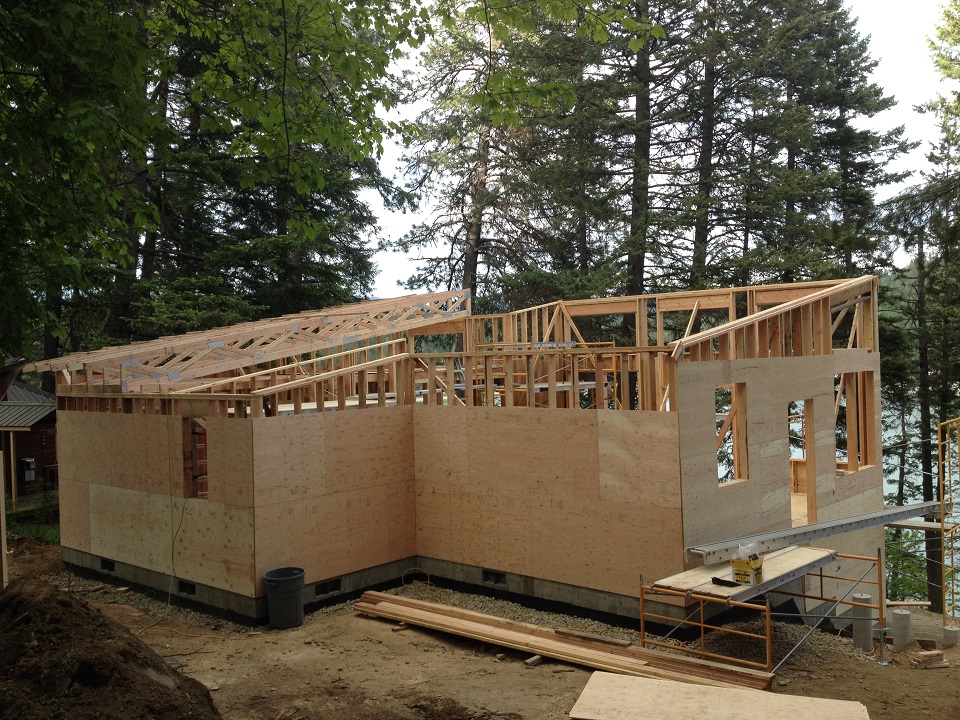
We then proceeded with wall framing. Many of the walls in this design are what are known as rake walls, following the pitch of the ceiling and the roof. In this case, the pitch of the roof and the ceiling are the same, and are shallow at only 2/12. We are using trusses to have a completely open span between exterior walls. The trusses carry both the ceiling board on the bottom cord and the roof deck and roofing materials on the top cord. They are also designed to carry 60 lbs. per square foot of snow load, which is typical for designs at this elevation. Whether we are using metal roofing or asphalt shingles, we always design the trusses for the snow load. Also, we make sure there is enough room in the truss depth to ventilate the underside of the roof deck with at least a 2" vent channel, and that there is enough room for at least enough insulation to achieve R-49. We make sure these capabilities extend out to the edge of the exterior walls. In truss nomenclature, this is sometimes referred to as a raised energy heel.
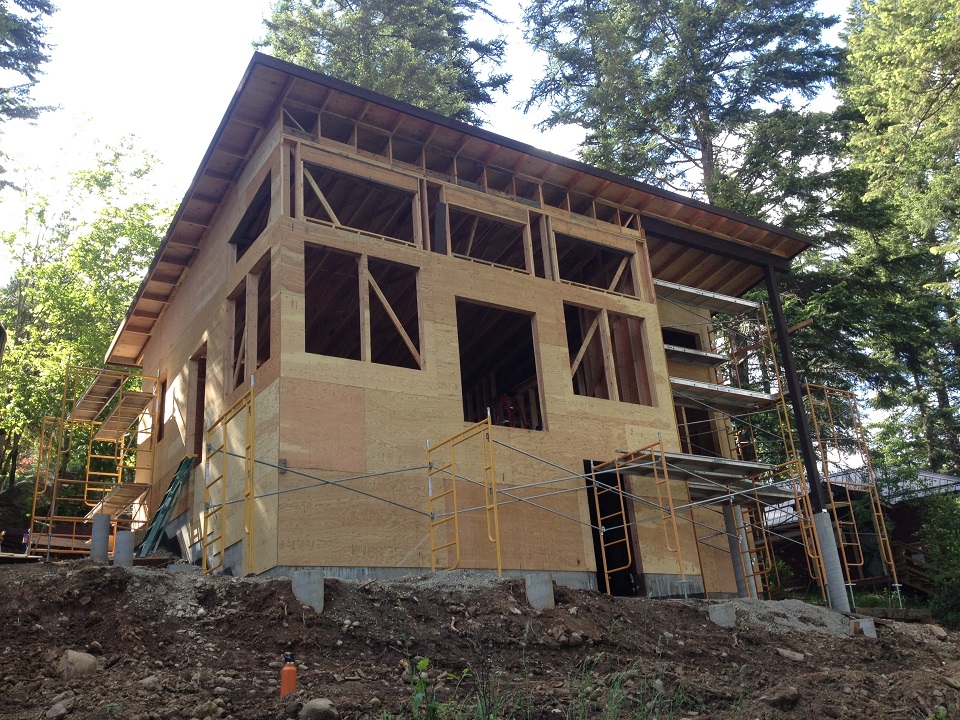
In the below photo, framing is virtually complete. All we lack is a couple of sheets of plywood on this lake facing wall. Whereas some other builders use OSB, or oriented strand board for the exterior wall and roof deck sheathing, and though the American Plywood Association equates the capabilities of OSB with that of CDX plywood, we have been convinced over time that CDX plywood is a superior product to OSB in these applications, and so we use 1/2" CDX for the walls and 5/8" 5-ply CDX for the roof deck. They are a more expensive product than OSB, but in the overall cost of most homes, they simply are not budget busters that we avoid them for the cost savings of OSB. When installing roof decks and wall sheathing, we use 2 3/8" long 8d ring shank nails, and it is important when using pneumatic framing nailers not to overdrive these nails, or else shear strength is lost. The plywood sheathing products not only provide support for roof load and backing for other building materials, but both roof and wall sheathing resist the wind and other forces pushing on a building, that would otherwise cause a building to lean or "rack". This resistance is shear resistance, and it is accomplished not only by the plywood product but most particularly by the nails holding on the plywood. The strongest shear resistant geometric form is a triangle, and a triangle is formed between every three nails:
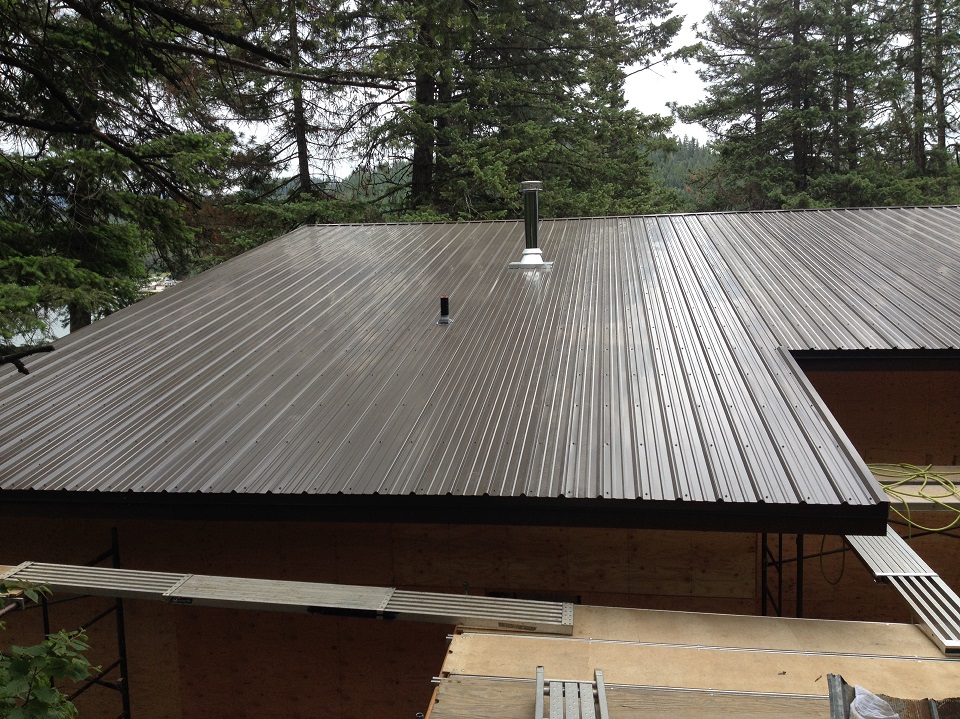
Since this roof is only a 2/12 pitch, in order to assure the water-tightness of the roof, we used ice and water shield underlayment on the entire roof deck below the metal roofing. Ice and water shield adheres to the roof deck and seals around every screw that holds on the metal roofing, preventing any possible water penetration. Also, all of the long seams of the metal roofing are sealed with butyl tape. The roofing color in this case is Burnished Slate by Metal Sales manufacturing Corporation in Spokane, WA. This is their Classic Rib design with exposed fasteners.
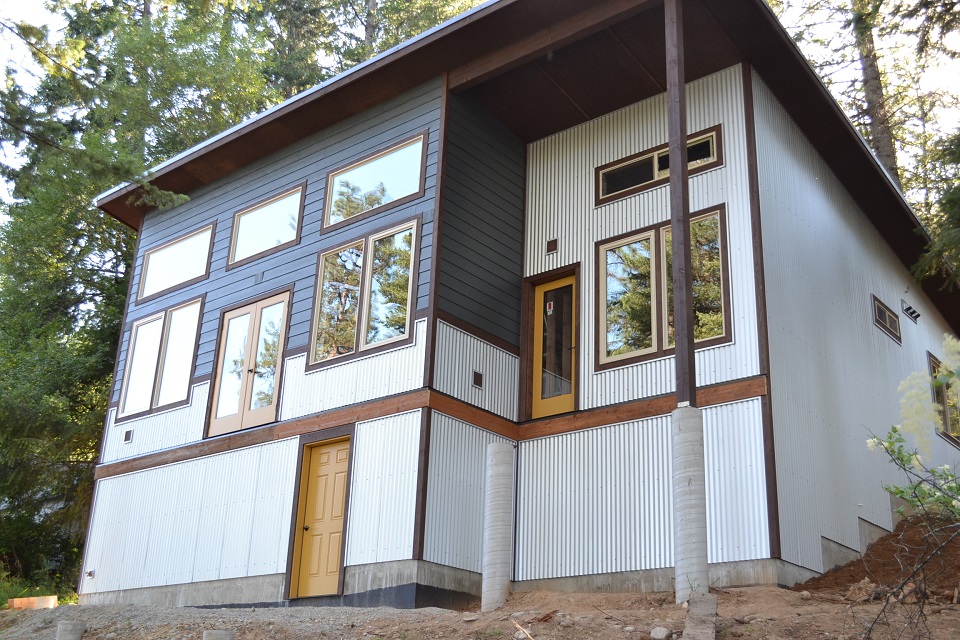
The fascia is 2x8 Cedar stained with an oil based stain called Woodtech (available here in the Northwest) and sold by Sherwin Williams. The color of the fascia and all of the 1x4 Cedar window, door and corner trim (and the Cedar 1x6 belly band) is English Walnut.
The windows are Jeld-Wen premium vinyl windows in almond color. The metal siding is 2 1/2" corrugated galvalume also sold by Metal Sales. The lap siding is fiber cement siding by Allura. The exterior doors are Thermatru Smoothstar fiberglass entry doors.
We had the posts and beams milled at full dimension (6x6, 6x8 and 6x12) and kiln dried out of Douglas Fir on a bandsaw mill by a timber provider in Bonners Ferry, Idaho and sold by Sandpoint Building Supply.
The soffitt and porch ceilings are a rough-sawn 3/8" plywood stained with the Woodtech English Walnut oil based stain. We have installed an ACQ treated 2x10 deck ledger for our upcoming construction of the large exterior decks. We have a dark brown metal Z flashing installed behind the siding and over these ledgers to keep water from intruding behind these ledgers once the deck is installed. Deck ledgers (and more specifically the house rim joist) are a common point of rot when not flashed properly.
Watch a video tour below of this new custom home exterior plus the interior framing:
|