Online Blog > Previous Entry 9/8/2019 > 5/31/2020 - Lake view large shop with apartment and RV hook-ups > Next Entry 12/15/2020.
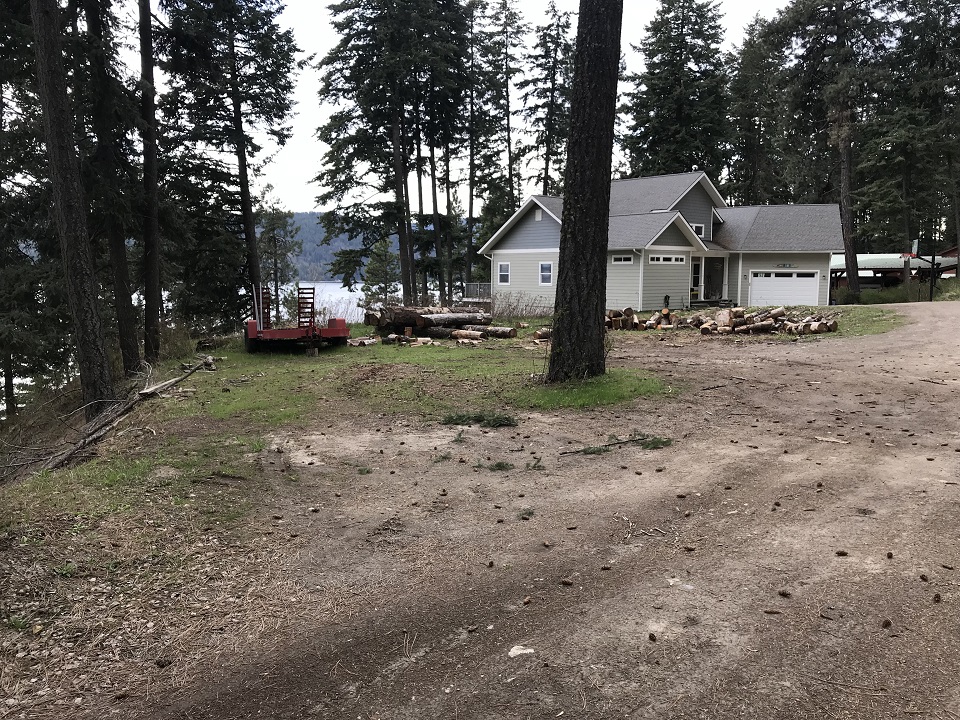
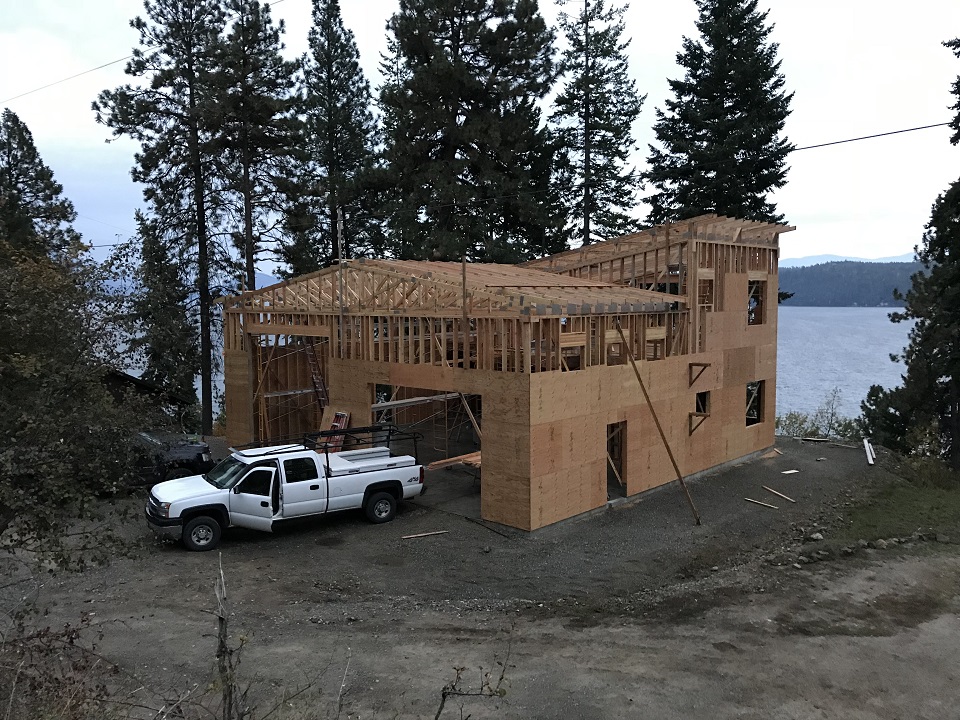
I met these new clients at Mick Duff's in Sandpoint for dinner. I don't even remember exactly what time of year it was (fall headed into winter, I think), but they described the lake-front property they had just acquired and showed me photos of it on a popular realtor website. We included in the conversation their plans for the first structure, a shop with living quarters and RV hook-ups, and future plans for a custom home. The property is waterfront, and they described three tiers to the property - the dock and boat house on the lake, a middle tier which is the future homesite, and the top tier on which they wanted to build the first building. I looked at the aerials, and dimensions are not typically on the aerials. It was an irregularly shaped lot with generous waterfront off of Sunnryside and an amazing view south across Lake Pend Oreille to the Monarchs. So, I designed the building they described using my Chief Architect software, this must have been over winter, and then we got set up to start their project without me having even yet been out to the property. The building we designed was wide, a total of 57' with roof overhangs, at least 44' deep, and the lot is only 100' wide on this top tier. We have built multiple units on waterfront lots in recent years, and I assumed this must be zoned Recreational by Bonner County (since it was waterfront and the lot was far less than 5 acres), which allows 5' sideyard setbacks from the adjacent lots. But, of course not taking anything for granted, I looked it up and lo and behold it was zoned Rural 5 acres. The lot was non-conforming to the zoning at less than 5 acres, and so there are allowances for it, but it meant my setbacks to the sideyard property lines was 12.5', and with the private road in front of where we would build, we had a 25' setback from that. Well, I finally showed up to the lot in the spring to measure the lot for our plan. It was May 2019, and I was just slightly concerned that our planned building was not going to fit before the tremendous drop-off down to the middle tier of the lot. Here is what I saw with the neighbor's house immediately next door:
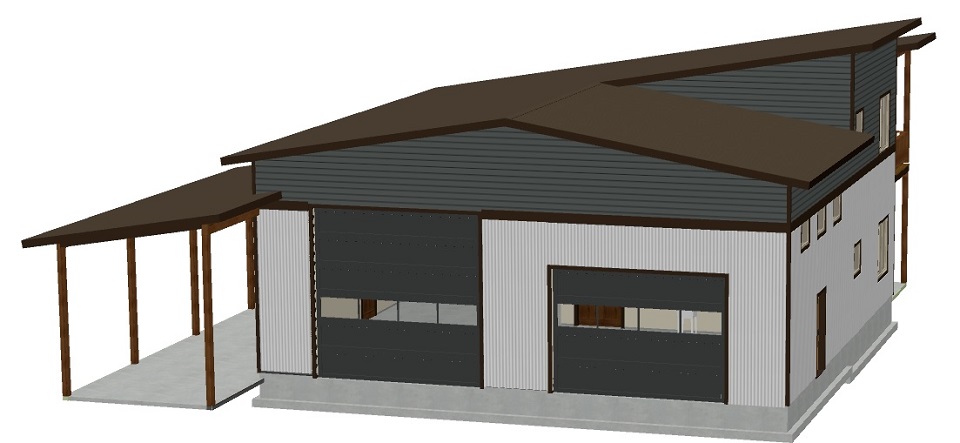
Frankly, it just didn't look like our plan was going to fit that seemingly small pad while meeting setbacks and without raising costs significantly by having a severely stepped foundation (at least the soils out there are almost all rock, which makes a very stable base upon which to build). I located 3 survey pins, used our transit to mark the property lines, and then set about laying out the foundation to see if it would fit. Yikes, it was going to be really tight, and we'd have to make some adjustments to the design. One of those adjustments was to shift the lake-side elevated deck from the middle of the building to the SW corner. The other was to move the carport forward of the building by 12', since the back of it would otherwise be on a 45 degree slope otherwise. By making these alterations to the plan, we managed to avoid cost increases from a more expensive foundation. Here is amended design:
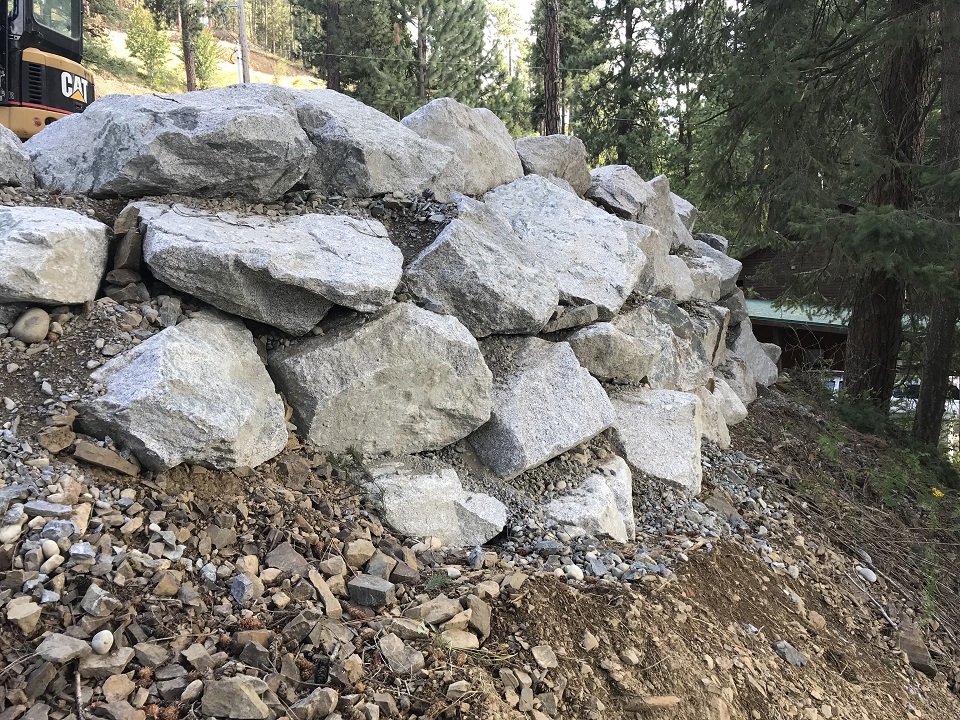
Making the building fit on the existing pad did require a boulder retaining wall to retain fill and make it possible to work around and walk around the new building. We compared different options for a retaining wall and determined that in this application salt and pepper granite boulders were the most cost effective option for what was needed on the site. We chose 3-4' diameter boulders and had them delivered by a local excavating contractor with rock boxes on his dump trucks, and we were actually able to place these with our own mini excavator as they were around 2,000 pounds each.
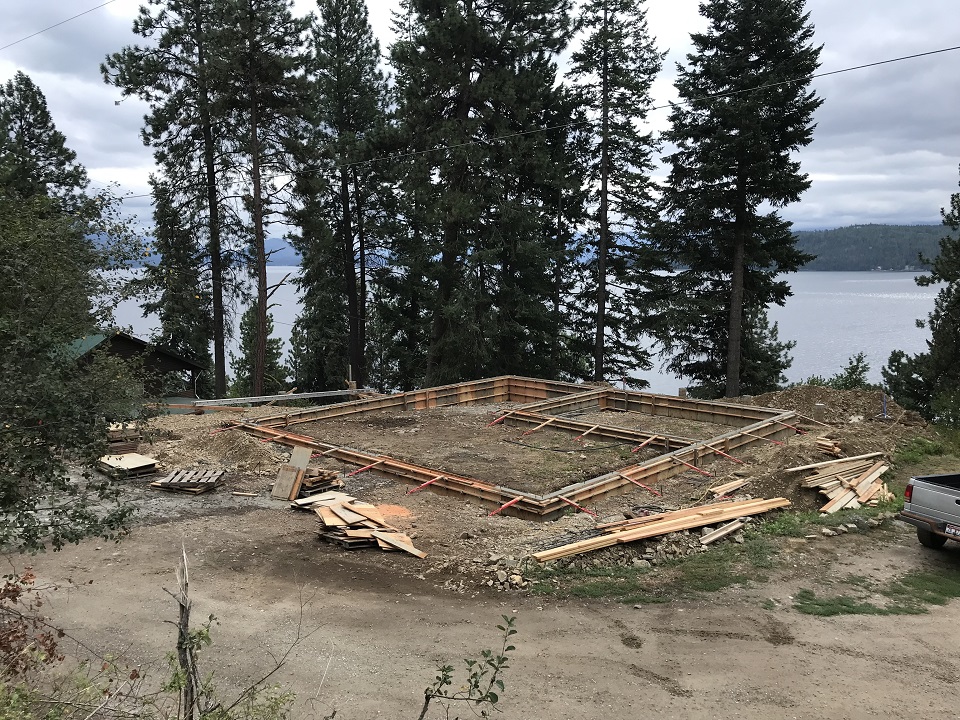
With that out of the way, we got right to work on the foundation, placing our concrete footers on virgin, undisturbed soils. The foundation only required a few steps, which allows us after backfill to make sure footers are at least 2' below grade to prevent frost heave in our climate zone. Below is a photo of the poured stem walls with the forms still on:
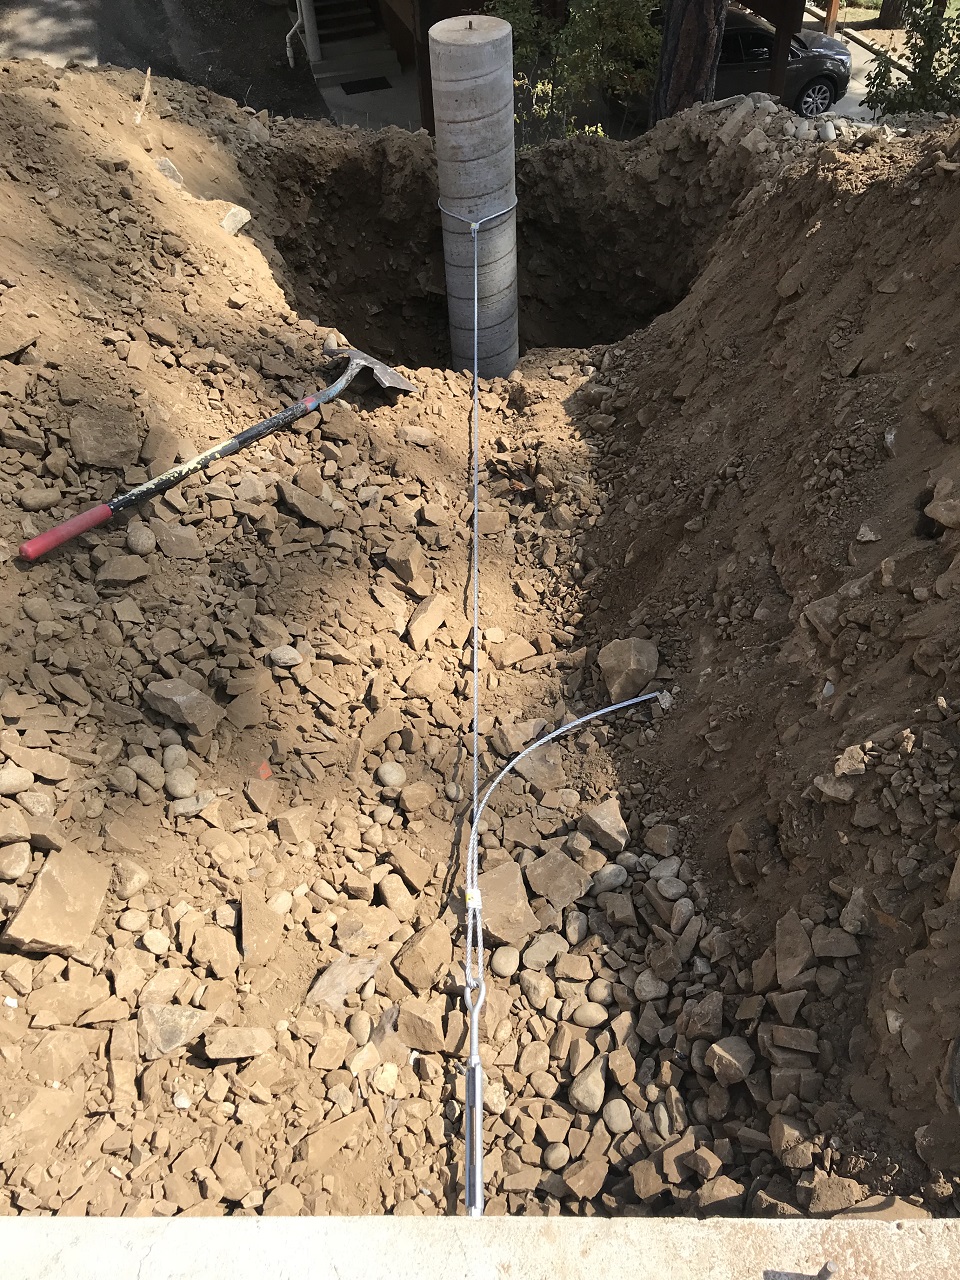
The carport/RV covered parking that we shifted forward of the front wall of the building due to the slope still had its southeast corner on a severe slope. To place the piers for the posts on undisturbed soils at 13' from the stem wall, a couple of the concrete piers were over 9' tall. In order to prevent them from being pushed laterally when we backfilled between the stem wall and the piers, we anchored them to the stem wall with Titan anchor bolts, galvanized cable and turnbuckles to adjust the tension as we backfilled. It was an easy solution and low cost:
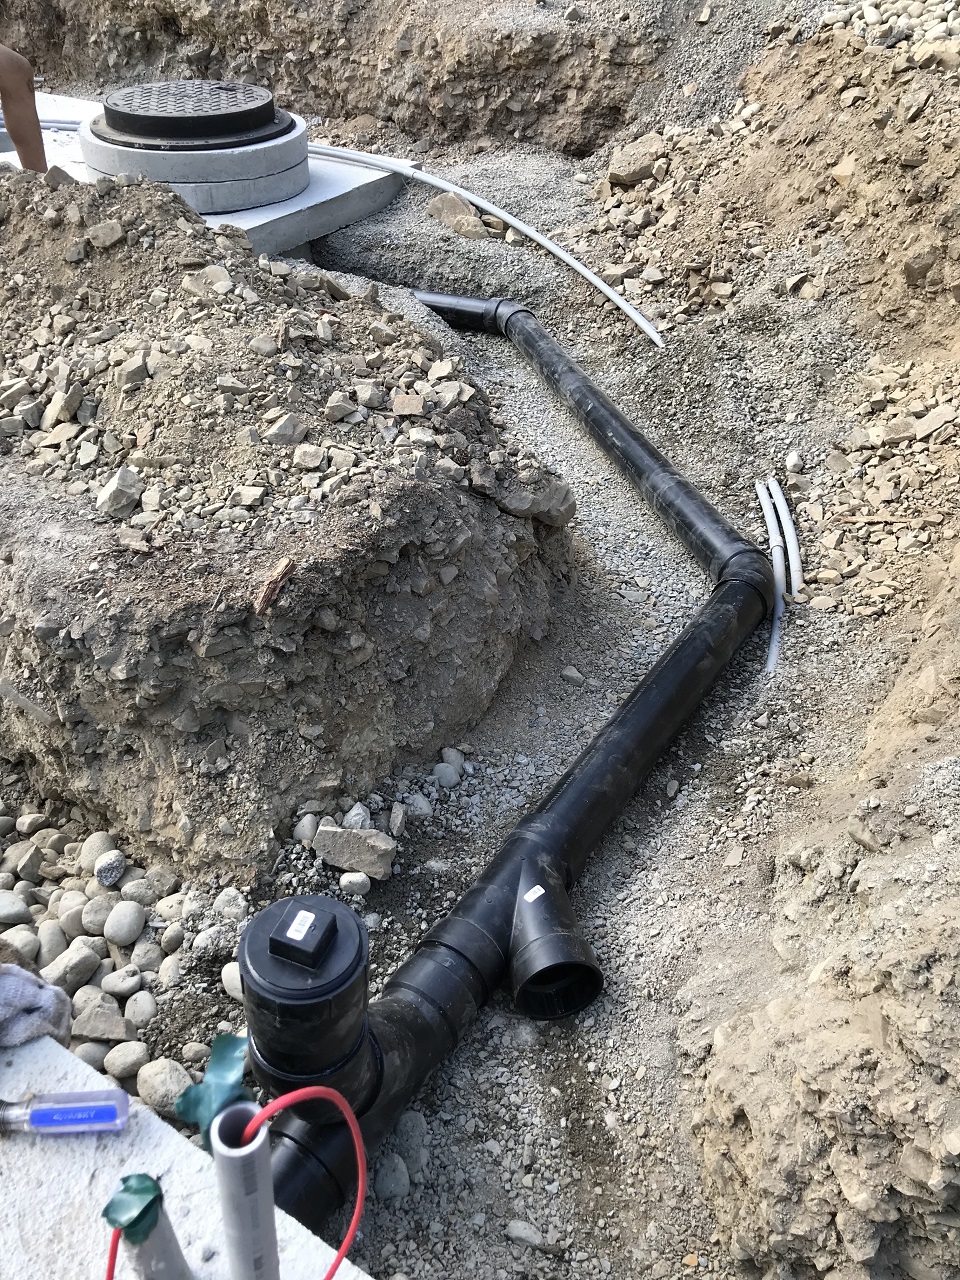
Since this is such a sloped lot, it turns out the septic field for this building is 250' away (and on a neighbor's parcel) and 60' above the elevation of the septic pump. Also, due to very limited pad room, we placed the septic tank with its pump station in the parking area in front of the building which requires a driveable concrete lid placed over the tank and concrete risers with heavy steel covers to access both the tank and the pump station (the pump is required to pump the effluent uphill to the field). The below photo is our gravity fed sewer line exiting the building and draining to the septic tank covered by the driveable lid. You can also see the conduits in place for the pump wire and the alarm float wires. You can see that we planned for those and poured those conduits into our stem wall so that there are no visible mechanicals on the outside of the building - the conduits bring the needed wires from underground directly into a framed wall cavity inside the building:
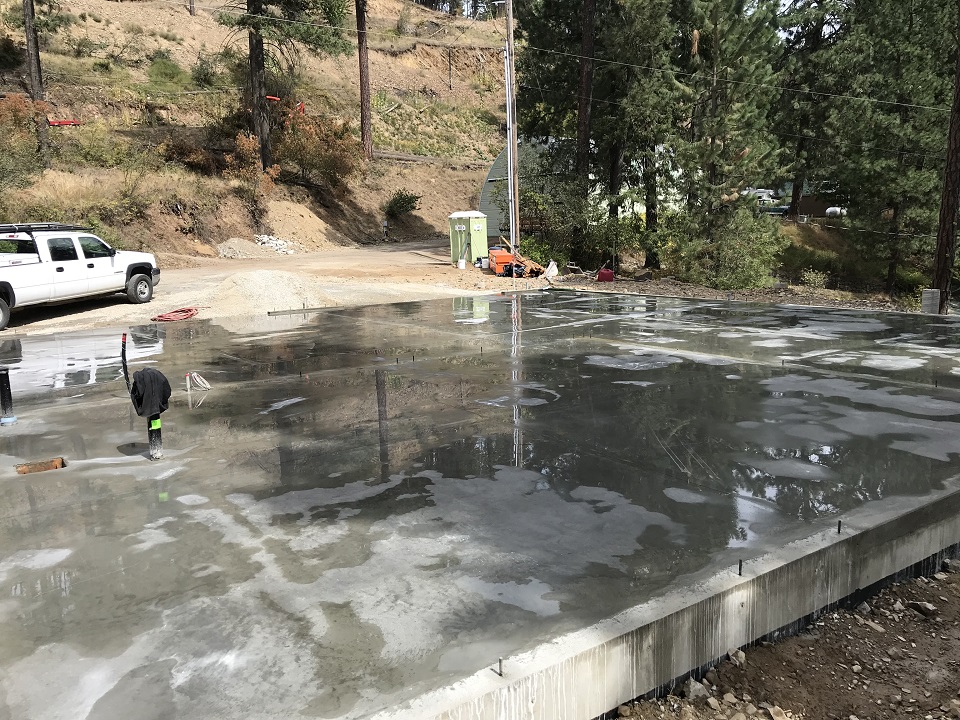
As part of the foundation, our own crew prepares the subbase for the slab, and we place a rebar grid and then pour and finish the slab:
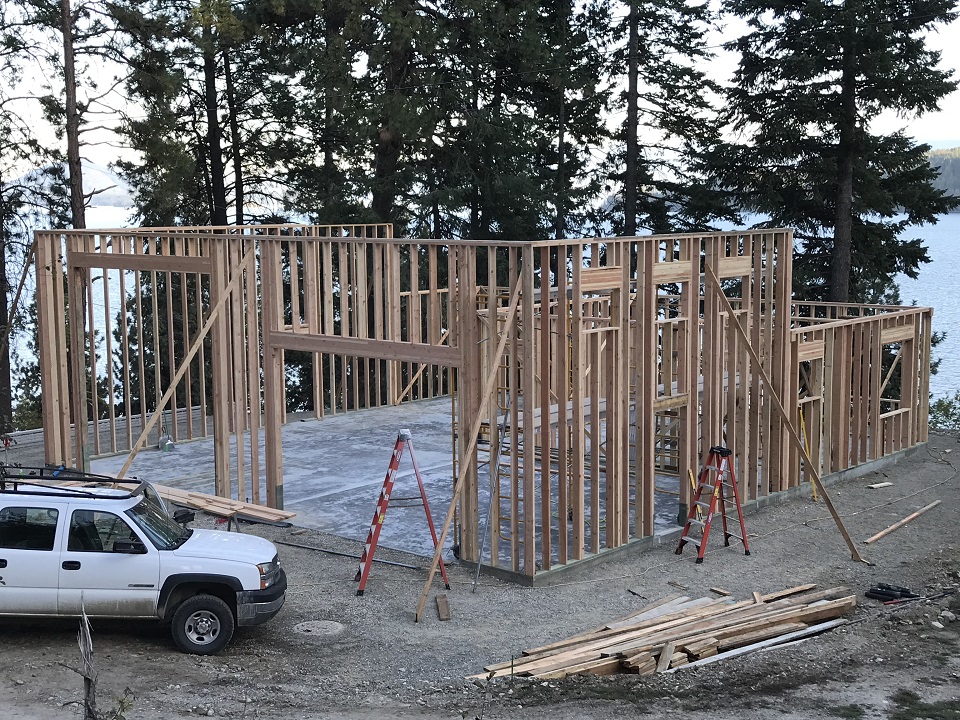
Then, it is finally time to frame walls, a time when it seems like buulding progress is rapid, and the shape and look of the structure finally becomes realized. This one has 16' walls in the main shop:
A little more framing progress - the apartment floor platform at the second level has been built, and we have sheeted the exterior walls as far as we can go before trusses. The plywood is also known as shear wall - it holds the building plumb and square, and it resists lateral forces. The remaining courses will be installed after the trusses to help tie the trusses to the walls:
And truss delivery and installation then happens:
Followed by the installation of the first finish product - the painted or stained fascia at the roof edges - and then we sheet the roof with 5/8" CDX plywood. We are now ready for roofing:
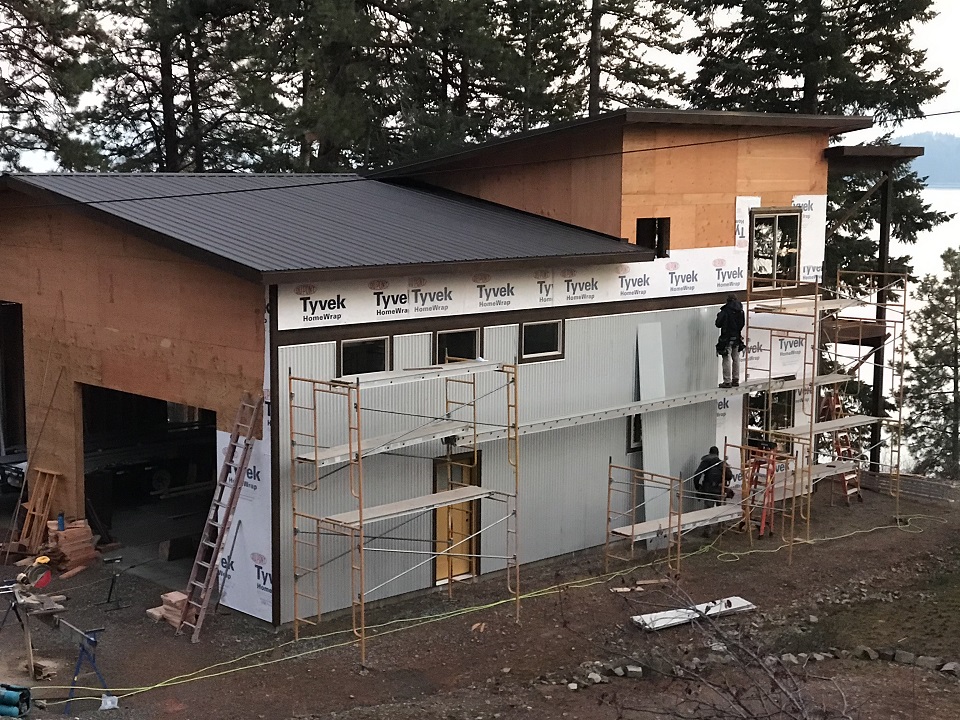
The roof pitch on this building is 2/12, and the trusses are rated for a 75 PSF snow load. We design the trusses for a heavy snow load regardless of whether asphalt shingles or metal roofing will be installed. This roof is "Burnished Slate" color by MetalSales in Spokane. You will also notice we framed the lakeside elevated deck at the 2nd floor level in the right side of the below photo. Siding progress is underway - we are using galvalume metal siding also by MetalSales, and then a stained Cedar trim band. Above that we will install fiber cement lap siding by Allura.
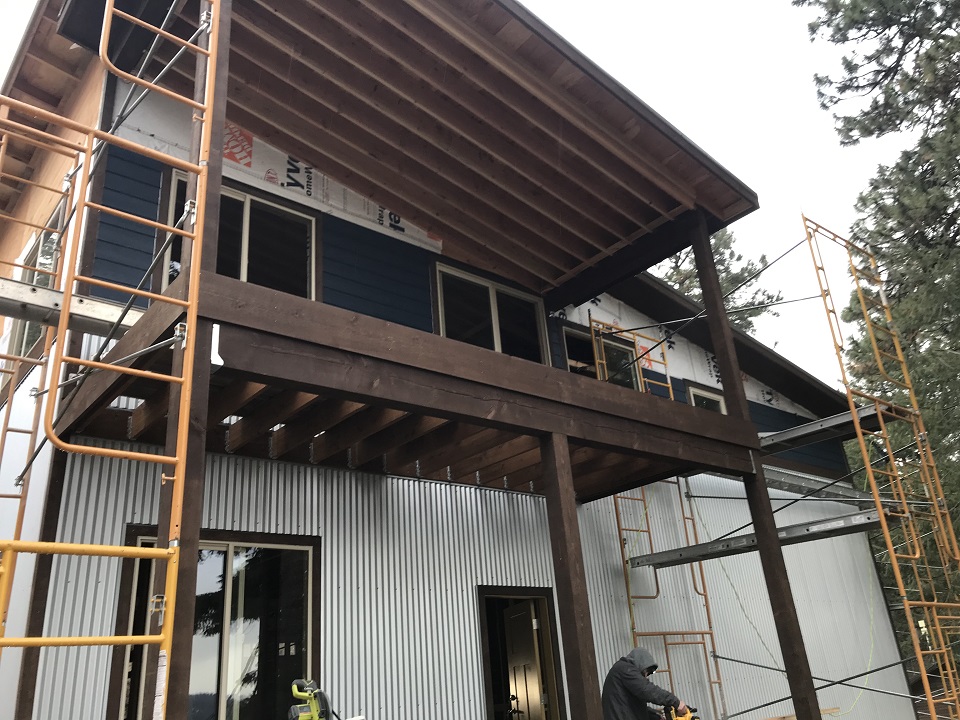
Here is the back side with the elevated deck. We have begun the lap siding installation:
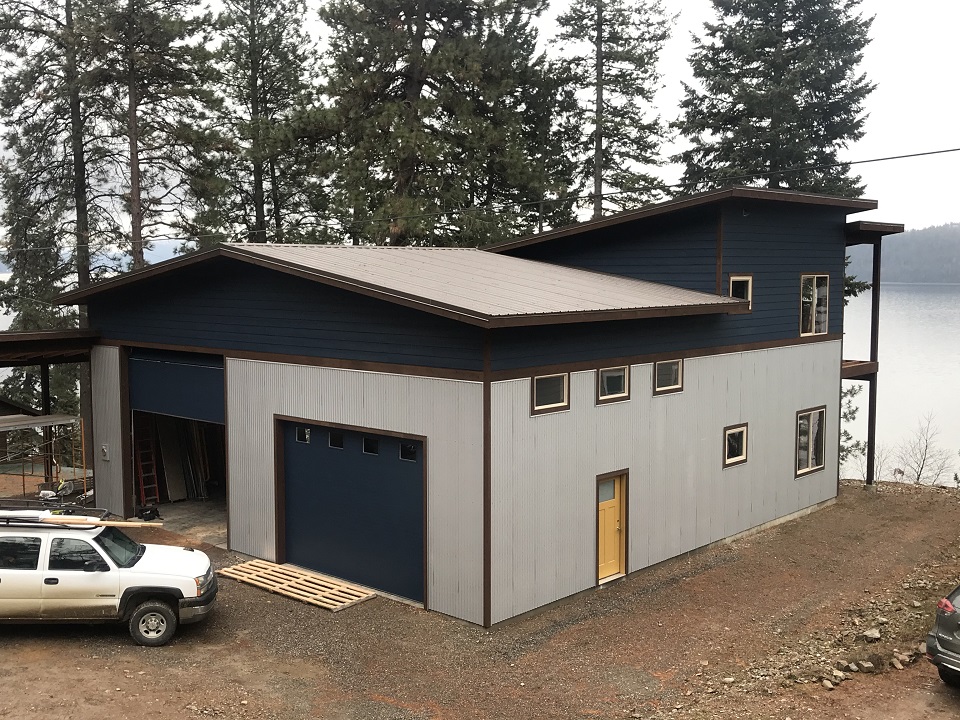
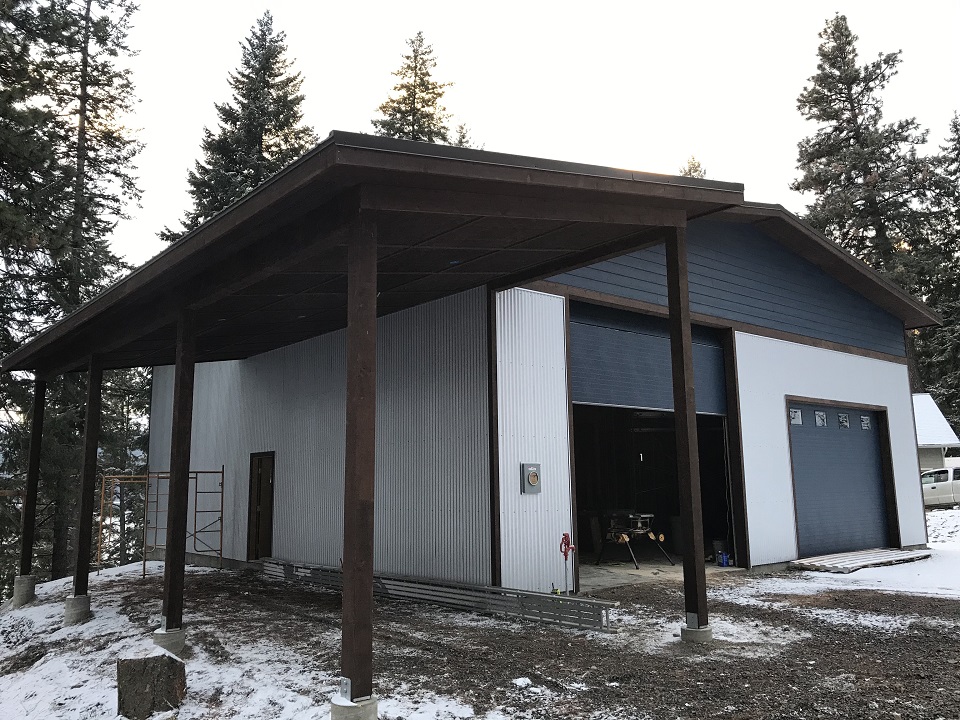
Finally the finished exterior look as the winter was soon to arrive. The garage doors were painted in our shop to match the lap siding color:
And here is a view of that covered RV parking area. Notice the back left side of that and of the building - the terrain really drops off from there. We covered the ceiling of the carport with 3/8", stained rough-sawn plywood and milled some 1/2"x2" battens to place in a grid and cover the seams in that ceiling. The stain on the trim and the ceiling is an oil based stain from Sherwin Williams, and the color is English Walnut:
|